
How-To Setup Sales and Inventory Forecasting in Business Central
Microsoft has provided an extension on Sales and Inventory Forecast using Azure AI. Azure AI is already connected to Business Central.

This app is pre-installed in the Business Central cloud version. But it needs to be setup and configured. Once it is setup and configured, it will help us future forecast of the Inventory based on past Sales history.
Step 1: Using the Global search, search for “Sales and Inventory Forecast Setup”

Step 2: Set required parameters, Period Type, Horizon, historical Periods, API URI and API Key

Step 3: For this example we will be setting these values.
Period Type: Months
Horizon: 12 (months)
Historical Period: 6 (months)
Continue with these steps to obtain the API URI and the API key.
Step 4: Open Azure AI Gallery

Step 5: Select "Open in Studio (Classic)"
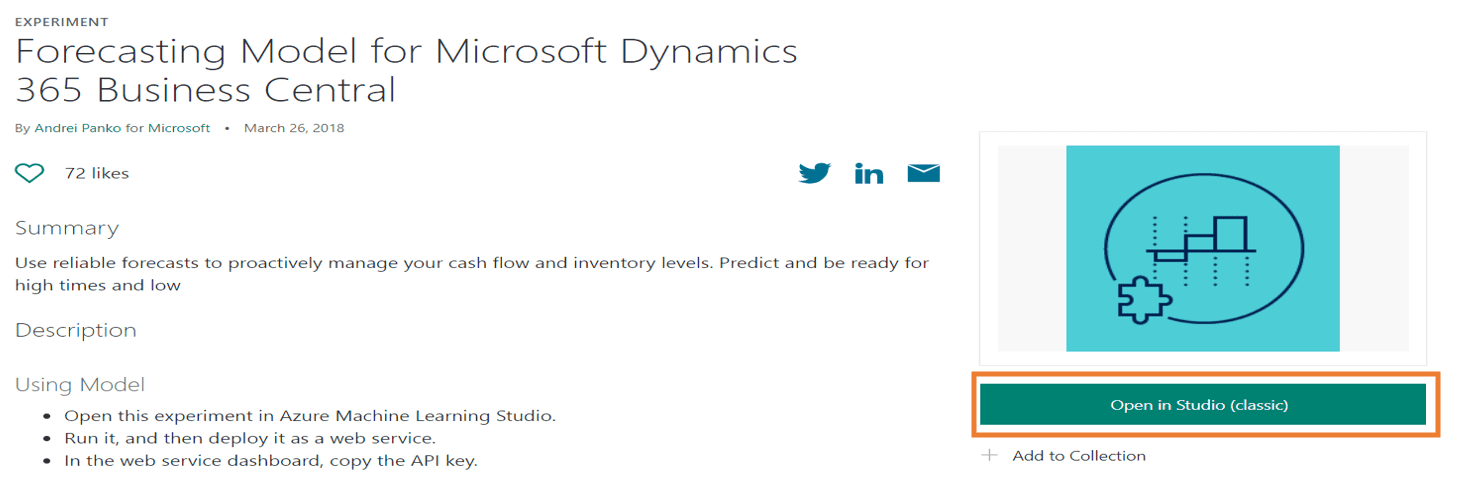
Step 6: Continue into the workspace

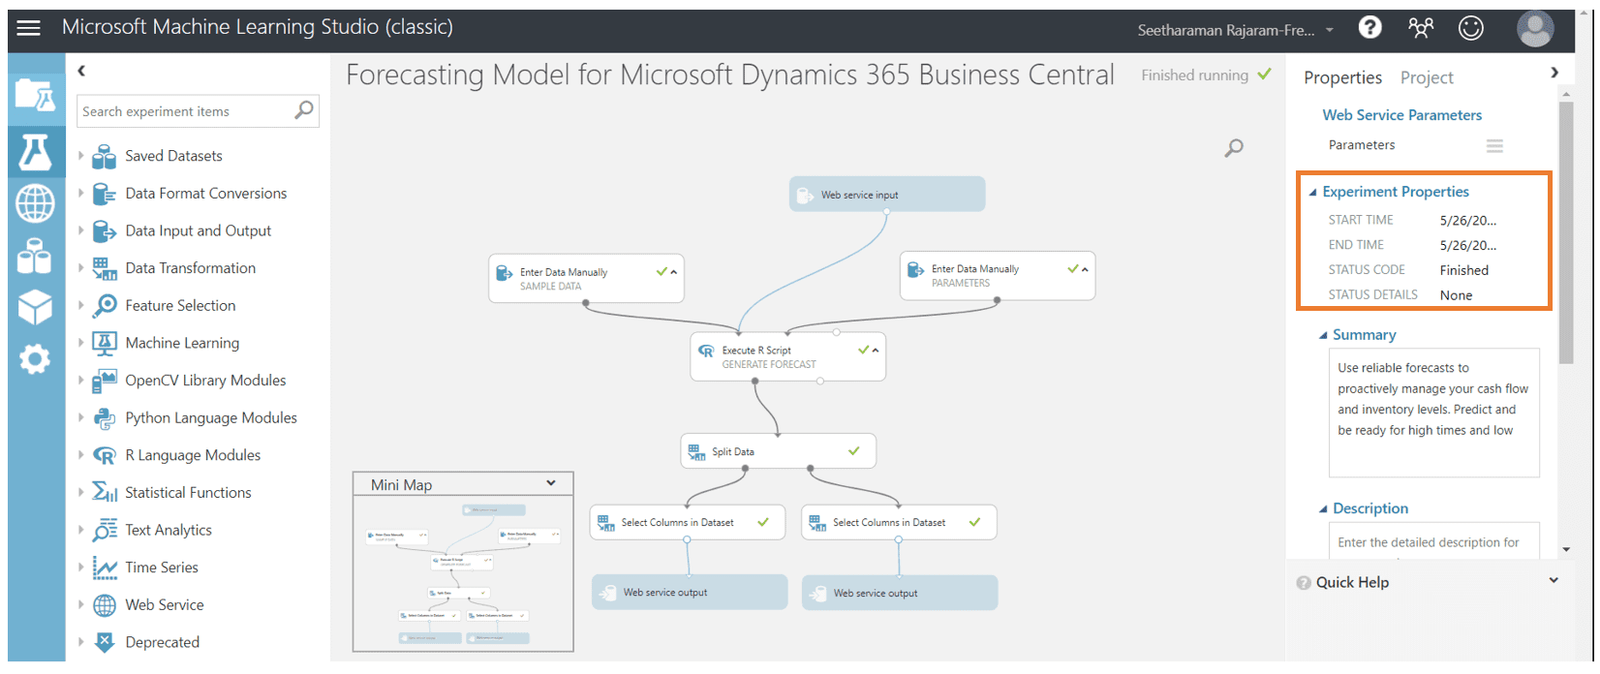
Step 7: Here you can see the workflow copied from the gallery.

Step 8: Save the workflow.

Step 9: Select "Run."

You can see the forecast is queued and then runs in the background.

When it has finished you will see this.
Step 10: Select "Deploy Web Service"

Step 11: Copy the API key

Step 12: Paste that API key into the Sales and Inventory Forecast Setup window from before.
Step 13: Select Request/Response

Step 14: Copy the API URI from the highlighted box below and paste into the appropriate record in the Sales and Inventory Forecast Setup window from before.

Step 15: After inputting all the correct parameter values, select "Update Forecast" in the Sales and Inventory Forecast Setup window.

Step 16: Now the Calculated Forecast is visible for all inventory items.

For any questions on this process please reach out to us at Support@BondConsultingServices.com or schedule a free consultation with one of our experts.

What's a Jump Bar in Dynamics 365 Sales?
The newest upgrade to Dynamics 365 Sales removed a feature called the Jump Bar which allowed a user to click a letter of the alphabet on the bottom of the user interface and immediately jump to that letter in the records they are looking through. To reimplement this useful navigation tool a system administrator must go into the settings and follow these steps:
• In your Dynamics 365 Sales environment, click the Settings icon > Advanced Settings

• Select “Customizations”

• Select “Customize the system”

• Select “Contacts” from the menu on the left of the interface. We are adding back the Jump Bar to jump through Contact records as an example.

• Navigate to the Controls tab above “Display Name: Contact”

• In the Controls tab select “Add Control" to access the Power Apps Grid.

• After clicking in we can see that the Jump Bar is disabled. To enable it click the "Configure Property" pencil icon.

•Select "Enable" and then Click OK

•Save and Publish

Please Note: You have to repeat this process for any record or entity to which you want to add the Jump Bar since it was disabled across the board in the recent update. For any questions on applying these changes pleases reach out to us at Support@BondConsultingServices.com or click here to schedule a free consultation with one of our experts.

How-To Use Multiple Currencies in Business Central
If you buy, sell, or record transactions using different currencies, then you must set up each currency that you use. The initial setup for multicurrency is complete by using the Currency Card and Currency Exchange Rates pages.
Currencies:
Open a currency card in the Currencies list. In the General tab, you will find general information about that currency, as well as the accounts for unrealized and realized gains and losses.
 If an additional reporting currency is implemented, you can select accounts for posting realized gains and losses in the Reporting tab of the Currency card.
As the Adjust Exchange Rates batch job is running, the exchange rate is calculated to adjust the general ledger accounts. On the Residual Accounts side, these G/L accounts will be used to post rounding differences.

Currency Exchange Rate
Manual setup:
To record exchange rates and see the history of previous entries for exchange rates, you can search for the Currency Exchange Rates page, as it is updated on a regular basis. You have an option to setup the exchange range manually, by following these steps:
- Select the line for currency in the Currencies list > Process > Exch. Rates

- In the Currency Exchange Rates page, populate the fields as needed. Leave the Relational Currency Code field blank if local currency is given. A new line can be entered if a new exchange rate is needed at the given date.

To automatically register currency exchange rates, you can use various services in the Currency Exchange Rates page.
- In the Currency Exchange Rate Service page, you can add a service by providing Code, Description, Service URL and Service Provider. I will use Float Rate service in our example.

Populate the following fields:
Service URL: https://www.floatrates.com/daily/usd.xml
Terms of Service: https://www.floatrates.com/faq.html - In the Field mapping section of the page, populate the Source fields. Select the US_DATE_FORMAT field under the Transformation Rule column. Default Value is 1 under Relational Exch. Rate Amount.

- Enable the service. A job queue will be created that will update the exchange rate at the frequency that you chose. Leave the status of the job queue at the Set Status to Ready to run it as scheduled.

- In the Vendor Card, select the currency under the Invoicing tab for that vendor. Optional step. Currency could be added in the document as well (Purchase Order or Sales Order)

- Create a Purchase Invoice and under the Invoice Details tab, you will see the Currency Code is populated automatically directly from the vendor card.

For more information on Multicurrency please reach out to us at Support@BondConsultingServices.com or click here to schedule a free consultation with one of our experts.

What is NCE?
Back in January, Microsoft started offering New Commerce Experience (NCE) seat-based offers for Microsoft 365, Dynamics 365, Power Platform, and Windows 365. These new offers come with more flexibility for clients by providing new options to lock in their subscription for multiple years at the same price point, or to select subscription options that allow for changes in the number of licenses month to month. Overall, not much is changing for our clients, however, all clients will be required to renew their subscription to one of the new seat-based offers at the end of their terms after July 11, 2022.
Why is Microsoft making these changes? NCE provides more options for clients to purchase their software based on their business needs. With the new Multi-Year Plan, you can lock in your subscription price for up to 3 years ensuring immunity to price increases for the most important software that runs your business. Also, with the Monthly Plan clients can change the number of licenses they use every month, enabling them to reduce their usage without any further financial commitment. However, the annual or multi-year plans are commitments for the full term, and those seat-based licenses cannot be reduced mid-term.
NCE also includes more options for free product trials that can be upgraded to subscriptions. Clients will also be able to purchase certain Microsoft AppSource add-ons through Bond Consulting Services (BCS), enabling consolidation of related software subscriptions onto a single monthly invoice.
As of July 11, 2022, your old subscription package will not automatically renew any further, so please contact us at sales@BondConsultingServices.com to see how you can benefit from the transition to NCE seat-based licensing.

Where Can I See Posted Documents
In Business Central once transactions are posted, the historical transactions will be available for review under the ledger entries. In this blog, we will walkthrough the customer ledger entries page and the available options/processes within that page.
Accessing the Customer Ledger Entries
Customer Ledger entries can be accessed through two options noted below.
Option 1: Using the Search option
Click on the Search icon in the top right corner and search for "Customer Ledger Entries". Select the option highlighted below.

The Customer Ledger Entries window will open, showing all the AR posted transactions including Invoices, Credit Memos, and Payments for all customers.

You can use the search option or the filter to find the necessary entries. The list can also be exported to Excel by selecting Share > Open in Excel.
Option 2: From Customer Card
From the customer card, you can select Customer > Ledger Entries.

This will show you only the posted transactions for this customer and you can also search or filter the list as needed. This list can also be exported to Excel the same way by selecting Share > Open in Excel. You also have other options like applying, unapplying or reversing a transaction.
Customer Ledger Entries Processes
Once transactions are posted, there are several functions that are available from the customer ledger entries page which include:
- Change Transaction Due Dates
- Apply or Unapply Entries
- See Applied Entries
- Reverse Transactions**
- Drill down to the different ledgers
- Reopen posted transactions
**NOTE: Reversing of transactions has some limitations, depending on the transaction type and status.
The customer ledger entries are a good place to look up any customer transactional history. In addition, the built-in Business Central filter options allow you to filter through the data and export it to Excel for further analysis.
For answers to any questions you may have about this topic or any related to Dynamics 365 products, please reach out to Sales@lime-falcon-860444.hostingersite.com or click here to schedule a free consultation with one of our experts.

What is the Essential Business Insights Extension?
One of the most overlooked features in Business Central is the Essential Business Insights extension. The Essential Business Insights extension finds business facts in your company data and displays them. The insights could be from the last week, month, three months from the current date, being updated every 10 minutes.
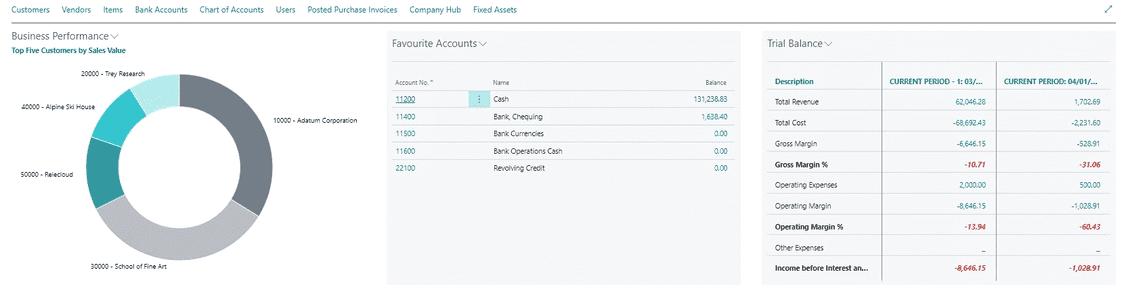 For example, in the Favorite Accounts tile, you can add all G/L Accounts that you would like to review on a regular basis, by adding a new account with the Favorite Accounts dropdown.
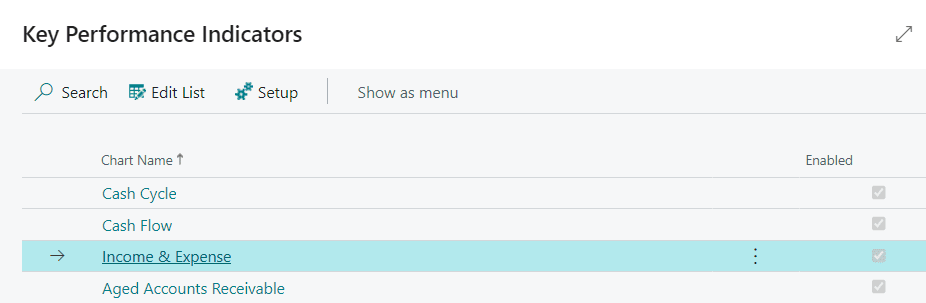
 For the Business Performance tile, you can choose your report in the Business Performance dropdown. I will select the Income & Expense chart > Setup
 Populate each field as needed.

- The Account Schedule Name field has been initially setup in the Accounts Schedule and is used to generate this report. You can edit and adjust the accounts at your convenience.
- Column Layout Name also comes from the Accounts Schedule page and too can be adjusted as you like.

Once the setup is complete, you can see the result in your tile.
 Insights are a great resource to easily view and expose your Business Central data. If you need help setting up these reports, contact us at Support@lime-falcon-860444.hostingersite.com or click here to schedule a free consultation with one of our experts.

How-To Depreciate Fixed Assets in Business Central
Once the fixed assets have been setup in Business Central, users will need to be able to process depreciation. Depreciation is used to allocate the cost of fixed assets, such as machinery and equipment, over their depreciable life. For each fixed asset, you must make sure that the following is setup/defined.
- Each asset is setup in Business Central with its own Fixed Asset card and relevant details
- Make sure that a depreciation method is assigned along with a depreciation book code
- Depreciation Starting Date and No of Depreciation years are populated
- Make sure the item has been acquired

Once the above has been confirmed, there are two ways to post depreciation:
- Automatically, by running the Calculate Depreciation batch job
- Manually, by using the fixed asset G/L journal
To Calculate Depreciation Automatically
- Search for Calculate Depreciation function in the global search or in the Fixed Assets page select Process > Calculate Depreciation.


- In the Calculate Depreciation window, select the Depreciation Book, FA Posting Date, and other fields. In addition, you can filter by a specific asset, class or subclass. Click Ok.

- The batch job will calculate the depreciation and create lines in the fixed asset G/L journal.
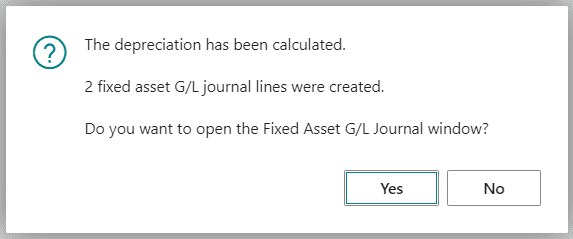
- Select Yes or search for Fixed Asset G/L Journal in the global search.

- On the Fixed Asset G/L Journal page, in the of Depreciation Days field, you can see how many days of depreciation has been calculated for.

- Once all the fields are confirmed, select Process > Post to record depreciation in both the FA subledger and general ledger.

To Post Depreciation Manually from the Fixed Asset G/L Journal
- Search for Fixed Asset G/L Journal in the global search.

- Create an initial journal line and populate the fields as necessary. In the FA Posting Type field, select Depreciation.

- Select Process > Insert FA Bal. Account A second journal line is created for the balancing account that is set up for allocation posting.

- Choose the Post action to post the journal and record depreciation in both the FA subledger and general ledger.

For more information about this process or any Dynamics products please reach out to Support@BondConsultingServices.com or click here to schedule a free consultation with our expert analysts.

The Best 3rd Party Reporting Tools for Business Central
Financial reporting and analysis tools are critical to any business. Although the native Business Central reporting tools meet requirements for many companies, some organizations find the Business Central tools lack the flexibility for complex and robust reporting needs.
Bond Consulting Services has partnered with two fantastic companies that offer reporting tools for Business Central providing greater depth and customizability.
![]()
FYIsoft is an approved Microsoft Partner with financial reporting solutions that integrate with any Dynamics ERP in the Microsoft ecosystem. The Financial Reporting Software is a dedicated financial reporting tool that utilizes general ledger and budget data to create financial statements including consolidated financial reports. Also, the Budgeting and Analytics modules provide for more advanced budgeting and reporting capabilities.
User friendly interfaces require little technical knowledge to create and generate consistent, informative financial statement formats. FYIsoft can run repeated reports at the touch of a button, making it easy to generate and distribute monthly, quarterly, and annual financial reports. FYIsoft is similar to Management Reporter (and FRx) and will be familiar to many Dynamics users.
![]()
Insight Software is another approved Microsoft Partner that provides Jet Reports, which is an Excel add-in offering fast and flexible financial and enterprise-wide reporting for ant Dynamics ERP and/or CRM in the Microsoft ecosystem. Jet Reports allows users to create financial reports from the general ledger module as well as reporting from master records, documents and/or detail level data in non-G/L modules like Purchasing and/or Sales. Jet Reports allows consolidated reports, cross-company and cross-platform reporting.
Jet Reports empowers users to access the data they need and create custom reports. The Budgeting and Analytics modules also provide for more advanced budgeting and reporting capabilities. Jet Reports requires some technical knowledge from the users, but leveraging Jet wizards greatly simplifies the report writing process. Jet Reports also pairs well with Power BI if you are looking for dashboards, great graphics, and more.
Contact Bond Consulting Services to discuss how these products can address your business needs.
For more information on these solutions reach out to us at Sales@BondConsultingServices.com

What is a Paginated Report?
There are two different ways to create reports in Power BI, Power BI reports and Power BI paginated reports. Power BI reports are interactive with multiple helpful visuals, which are great for analytics and can be developed in Power BI Service or Power BI Desktop. For a more detailed view into these visualizations there are paginated reports. For those who need to dig deeper into the information contained on the helpful pie charts and other visualization tools of Power BI paginated reports provide that depth of detail so that actionable insights do not go unnoticed. Power BI Report Builder is a free paginated report authoring tool, and it is a standalone tool.
Paginated Reports are designed and formatted to be shared and printed out as documents. They are created with RDL technology in the Power BI Premium License and can contain detailed technical data including informational reports, transaction records, invoices for a certain period, and even letters. See an invoice sample below:

You can set up subscriptions to your most important reports, automatically sending key personnel the data they require on a timely basis. Users can subscribe to a certain report or just a page in Power BI Service and have that report sent to them on a daily or weekly basis. The reporting intervals are customizable as well.

Requirements:
- Download Power BI Report Builder from the Microsoft Download Center for free.
- Publish and share paginated reports in a workspace, as long as the workspace is in a Power BI Premium capacity, and you have write access to the workspace.
- In a Premium Gen1 capacity, a Power BI admin needs to enable paginated reports in the Premium capacities section of the Power BI admin portal.
- In a Premium Gen2 capacity, paginated reports are enabled automatically.
For more details on licenses, permissions, and latest updates, refer to Microsoft documentation.
Data sources: Cloud or on-premise (gateway required so that Power BI service can connect to your on-premise data sources)
Where to view: Power BI service, Power BI mobile app, custom apps
Export to: Excel, PowerPoint, PDF, Word, .csv, Web Archive, XML
Subscription allows to deliver the reports to users on schedule.
Please reach out to us at Support@BondConsultingServices.com or schedule a call with one of our experts to help you set up Paginated Reports.

How Do I Change the Value of a Fixed Asset
If you have the need to change the value of an asset that was already put into service, you can change the value of the asset by following the steps below:
As usual, we suggest having a SQL Server database backup of the company database on which you will be working; have a DBA or IT person help you with this process.
Before you begin, we suggest having these steps run after running the GL posting routine to clear out any GL activities that may get rolled into the GL entries created by these next steps.
- Open the Asset Book window (Cards >> Fixed Assets >> Book) and then enter, or select, the asset and book for which you will be adjusting the value.

- Adjust the Cost Basis field to the new value.

- Save the change by clicking the ‘Save’ button.
- Click Yes on the depreciation recalculation option and select ‘Life’ in the Reset depreciation option.
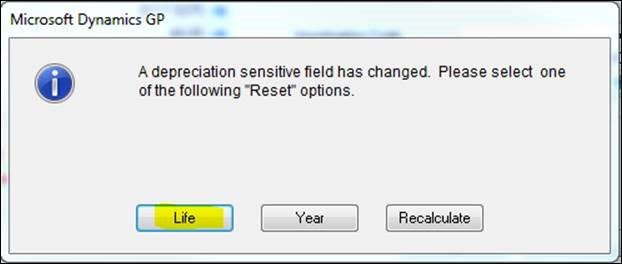
This option selected will back out all the depreciation that had previously been posted and calculate the new depreciation rates based on the new value.
- Run the Depreciation routine through the last period where depreciation had been run most recently.
- Run the GL Posting routine to book the GL activity backing out and incorporating the new cumulative depreciation amounts on the same GL entry; the net amount will reflect any differences between what had been booked versus what should have been booked to the GL as a catch-up entry.
- Look up and review the fixed assets batch within the Financial series (Transactions >> Financial >> Batches).
- If everything looks to be in order, post the batch.
For more information about Dynamics GP or any other product in the Dynamics pantheon, please reach out to us at Support@BondConsultingServices.com or click here to schedule a free consultation with one of our experts!